The browser extension tutorial - Part 2 - "How to install & test your extension". In this second part of our series on "How to create a browser add-on which works on all popular web browsers", we'll focus on how to install and test our own WebExtension.
In most parts this is easy nowerdays. Installing your program on the mayor web browsers is straight forward. The Firefox browser need some extra steps and also an update in the manifest file. But this is also an easy modification.
Fortunately, if you setup everything correctly, your extension works without any modification on each browser platform and you can test your extension everywhere. In the next part of our tutorial series, we will publish our extension to the official browser Add-on stores.
- Part 1: How to develop your WebExtension
- Part 2: How to install & test your WebExtension
- Part 3: How to Publish your WebExtension
Let's dive in.
Google Chrome
Installing your browser extension on Google's Chrome browser is the most straight forward experience. In fact, the Chrome Browser should be your preferred platform to develop an WebExtension, mainly because your development extension is added permanently.
Hint: Use Chrome as your main development platform. Test your extension in the other browsers, if needed.
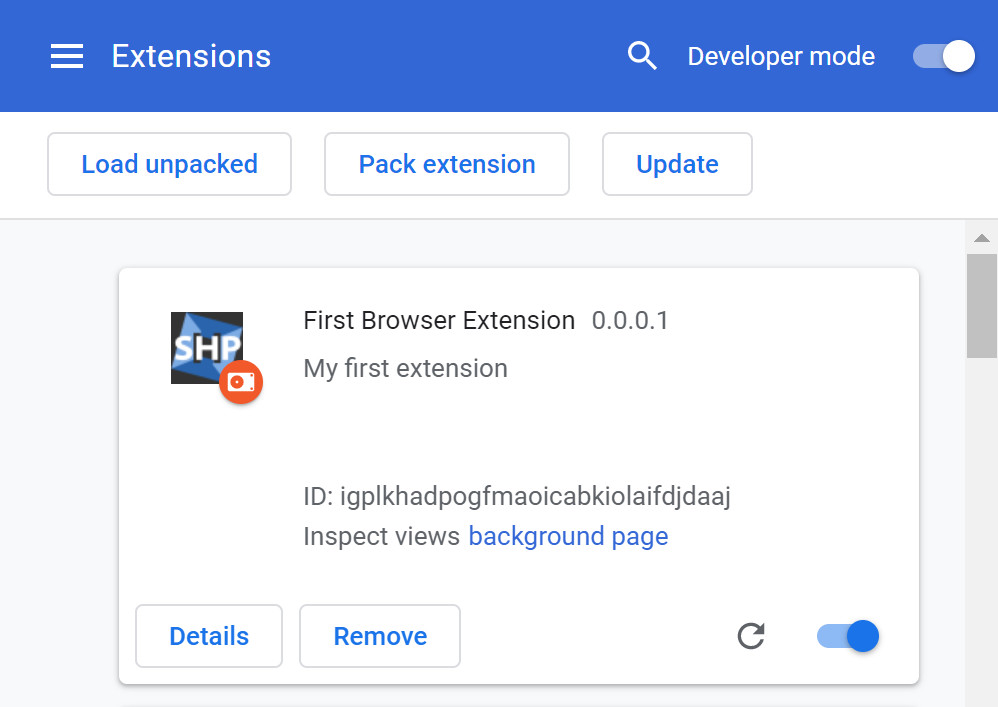
Install your extension

- Type
chrome:extensionsinto the URL bar in Chrome. - Activate the "Developer mode". (Top right corner)
- Click the "Load unpacked" button.
- Select your extension folder.
- Click the "Select folder" button.
If the extension is valid, you'll now see it in the list of installed extensions.
Persistence: Extension just stays installed
Once you've installed your dev extension in Chrome, it will be available until you remove it by yourself.
Microsoft Edge
Installing your extension in Edge is also straight forward.
Install your extension

- Type
edge:extensionsinto the URL bar in Edge. - Activate the "Developer mode". (Bottom left sidebar)
- Click the "Load unpacked" button.
- Select your extension folder.
- Click the "Select folder" button.
If the extension is valid, you'll now see it in the list of installed extensions.

Persistence: Extension stays installed + popup
Once you've installed your extension in Edge, it will be available until you remove it by yourself. After a restart of the browser, a confirm dialog will ask if you want deactivate the extension.
Mozilla Firefox
It's easy to add your dev add-on in Mozilla's Firefox. Following you'll find the instructions and trouble shooting tips.
- Download Firefox (Standard installation)
- Download Firefox Developer Edition (Developer)
- Download Nightly of Firefox (Nightly Build)
- Download Extended Support Release (ESR)
Which version should you choose? You can test your extension in each Firefox version. If you want, that your extension is still available after you re-started Firefox, you have to install the Developer, Nightly, or ESR versions. Find the detailed instructions on "How to make your dev extension persistent after re-start Firefox" here.
Install your extension

- Type
about:debugginginto the URL bar in Firefox. - Select the link "This Firefox" (Shortcut
about:debugging#/runtime/this-firefox) - Click the button "Load Temporary Add-on…"
- Locate your extension folder and select the manifest.json
- Click open.
If the extension is valid, you'll now see it in the list of installed temporary extensions.
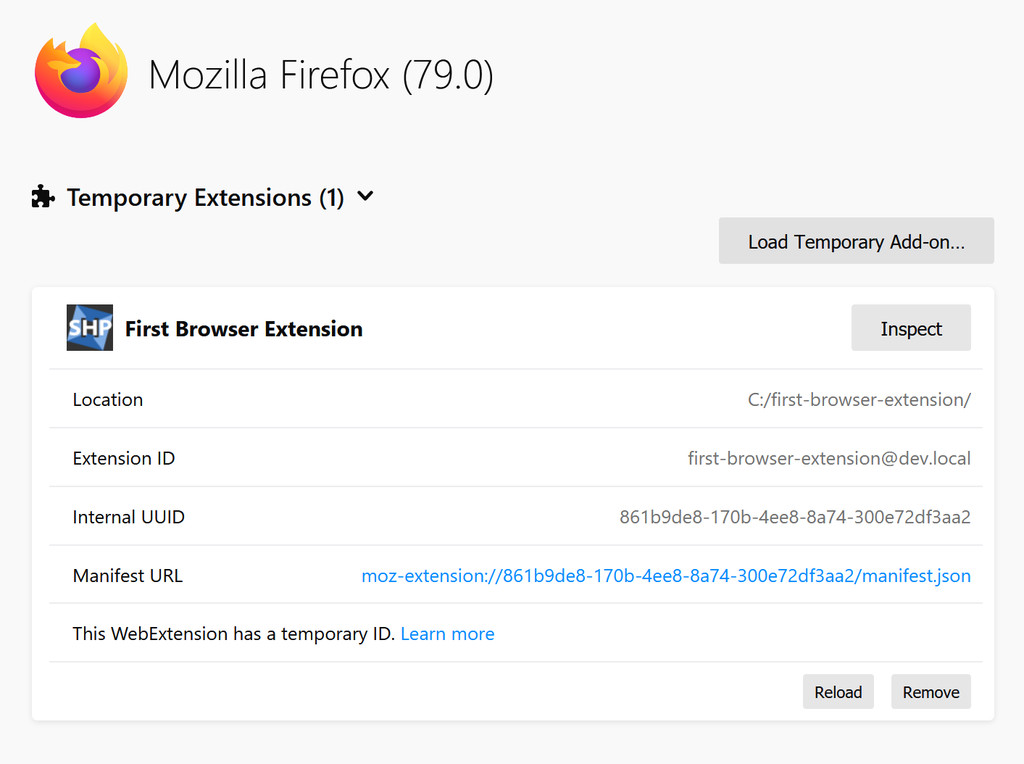
Unfortunately most of the time, its not valid at the first try. Below we added some hints how to surpass problems.
Problem: File does not contain a valid manifest
There is a common problem while installing an DEV extension in Firefox, and just a cryptic error message.
There was an error during the temporary add-on installation.
Error details: File does not contain a valid manifest
Fix 1: Add the missing gecko id
Firefox needs a special entry in the manifest.json which is not required by Chrome, Firefox, or Opera. If it's not available, you can't install the extension on Firefox.
The gecko id entry looks like this. Add it to your manifest.json file.
"browser_specific_settings": {
    "gecko": {
        "id": "your-browser-extension@your-site.local"
    }
}
ID? Which value for browser_specific_settings.gecko.id?
For this gecko id you could use a fictional non-existing email for your DEV add-on like (Example: your-browser-extension@your-site.local) This ID has to be unique.
Firefox documentation for browser_specific_settings gecko id
Fix 2: Update the structure of the .zip file
Hint: There is no need for a .zip file in order to test your extension. (Except if you want a permanent dev add-on) Better select the manifest.json to add the temporary Add-on.
Although you can direct select the manifest.json file from the un-packed extension to load the temporary Add-on, it's also possible to use a .zip or .xpi package.
If you create the ZIP file, its totally fine for Chrome and Edge, if the packed ZIP contains a sub folder with the name of the extension which than contains the manifest.json file. Unfortunately this doesn't work for Firefox.
Firefox requires all files to be in the root of the ZIP file.
How to pack the extension ZIP file for Firefox?
For Firefox, you have to select all required files and folders including the manifest.json, and created a ZIP with these files. Its not possible to just select the surrounding folder and pack it entirely.
See also this animated GIF for a better understanding.
# CORRECT STRUCTURE

your-browser-extension.zip
/manifest.json
/popup.html
Firefox documentation: Package your extension
Persistence: Extension removed after Firefox restart
A temporary installed add-on in Firefox is only available for the current browser session. If you close your Firefox browser, the extension is removed automatically and you have to install it again. It's possible to add it permanently using the method explained in the next section.
Storage data: The data stored for your temporary Add-on is still available after it's removed automatically. If you add it again, your extension can still access all stored data.
How to permanently add the Firefox Add-on?
Attention: Works only with the Firefox Developer Edition, a Nightly build of Firefox, or the Extended Support Release (ESR). You find all links here.
The permanent installation requires a .zip packed extension. Read our troubleshooting notes.
How to set it up to stay installed across restarts?
- Install one of the special Firefox versions mentioned above. (It doesn't work with regular Firefox!)
- Type
about:configinto the URL bar in Firefox. - Search for "xpinstall.signatures.required"
- Set value to false (Just double-click it)
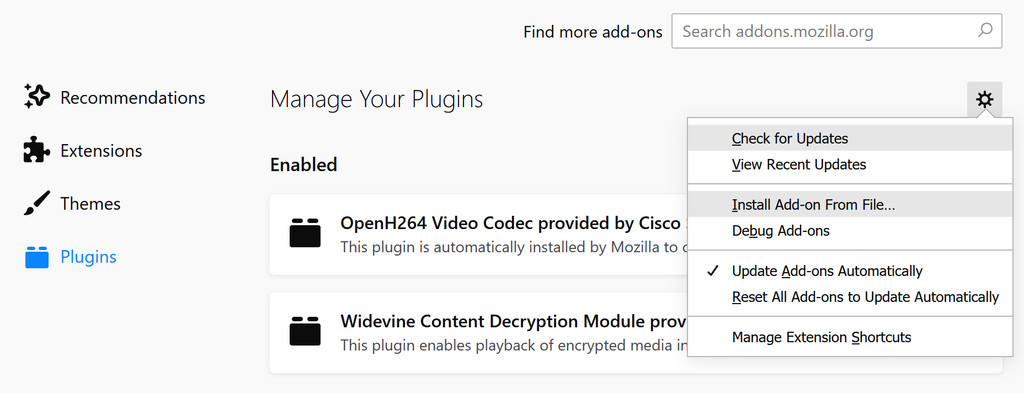
- Open the
about:addonspage and add your .zip packed extension. - Click the settings icon (right side) and select "Install Add-on From File"
- Select your zip file.
You Add-on will now stay installed across restarts.
If you get the error "File does not contain a valid manifest", you should read our how-to.
Opera
It's easy to add your dev add-on in Opera.
Install your extension

- Type
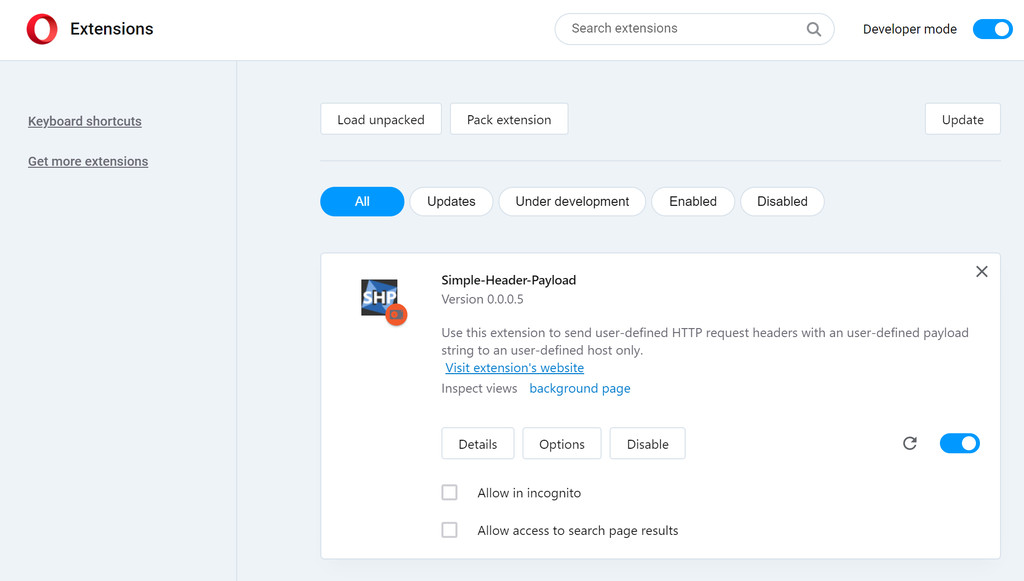
opera://extensionsinto the URL bar in Opera. - Enable the "Develper Mode" in the top right corner.
- Click the button "Load unpacked"
- Locate your extension folder it.
- Click open.
If the extension is valid, you'll now see it in the list of installed extensions.
Persistence: Extension just stays installed
Once you've installed your dev extension in Opera, it will be available until you remove it by yourself.
Appendix
Example: Minimal working cross-browser manifest.json
This is an example manifest.json file that contains all required fields in order to install it.
It will work in all browsers.
The key browser_specific_settings is required for Firefox only. It's nevertheless possible to install, test, and finally publish extensions which contains this key in all other browsers. Although this generates an error while testing, you should just leave it in your extension to make your extension cross-platform compatible.
Save the manifest.json to a folder (e.g. my-first-extension) an add it to your browser using the methods described above.
{
    "name": "My First Extension",
    "version": "0.0.0.1",
    "manifest_version": 2,
    "browser_specific_settings": {
        "gecko": {
            "id": "my-first-extension@my-site.local"
        }
    }
}Code language: JSON / JSON with Comments (json)
Final notes
- Part 1: How to develop your WebExtension
- Part 2: How to install & test your WebExtension
- Part 3: How to Publish your WebExtension